When your graphics are looking a little lackluster or your gaming is interrupted by latency issues, it may be time to upgrade your graphics processing unit (GPU), also known as a graphics card. Nervous about cracking open your tower? Don’t sweat it! Next to adding RAM, GPU swaps are one of the most straightforward and impactful upgrades to improve your gaming PC’s performance. Follow our step-by-step guide and get back to gaming!
What To Do Before Changing A Graphics Card
Before replacing your old graphics card, you’ll need to check three things: your power supply unit (PSU), the physical constraints of your case (i.e., will the card you want actually fit), and compatibility with your motherboard.
Is the power supply sufficient for the new GPU?
You need to verify two pieces of information to ensure your PSU and GPU are compatible: the minimum wattage recommended by the GPU manufacturer and the available Peripheral Component Interconnect Express (PCIe) connectors. For example, the NVIDIA GeForce GTX 3090 draws 350 watts, and NVIDIA recommends a minimum PSU wattage of 750 for best performance. That card will also require two available 8-pin PCIe power connectors (your existing card may only be using one, so check for extras that may be free). Check your existing PSU for a sticker indicating maximum wattage, and look for extra connectors while you’re in there.
Does the GPU fit in the PC case?
You’ll need to measure the available space in your PC case and compare that with the dimensions of the card you’re buying. Remember that modern GPUs can be up to a foot long and cover three expansion slots. Get measurements for the new card from the manufacturer’s website, then compare those numbers with your current card. Confirm that there’s enough room around the existing card, and that no neighboring expansion slots are occupied. You might need a vertical card adapter that flips the new GPU’s orientation to work around any size constraints you run into.
Is the GPU compatible with the motherboard?
Verify that your motherboard has a free x16 PCIe expansion slot. Your current GPU may not need the same bus speeds as the new one, so you’ll want to verify that the longer, x16 slot closest to your heatsink is available and that the PCIe power cords from your PSU can reach it.
Do you have the right tools?
You’ll need at least a slim Phillips head screwdriver and possibly a Torx wrench to complete this process. You might consider purchasing a purpose-built computer repair kit for this and any future repairs or upgrades. In addition to the tools you’ll need, these kits include anti-static mats or wrist bands. These help discharge built-up static electricity so you don’t accidentally ruin your new hardware. Pro Tip: If you don’t have a kit, discharge static buildup by tapping the side of the case a few times. Be sure your feet are on a rubber mat or solid-surface flooring rather than on the carpet directly.
Removing The Old Card
Now that pre-check has been completed, it’s almost time to open that case!
First, if you’re changing manufacturers – going from an AMD card to an NVIDIA model, for instance – you’ll want to remove the old device drivers before shutting down your computer. The easiest way to do this is from your PC Control Panel, but that process often leaves traces in your registry. A free utility like Display Driver Uninstaller will ensure every bit of your old driver is removed.
Now you’re ready to begin:
- Shut down your computer and disconnect all cables. To ensure all residual power is purged, hold down the power button for 10 seconds before continuing.
- Open your case. Most modern cases have pressure clips, but some may have thumb screws to remove before you can slide the side panel off.
- Locate the GPU and remove the power connectors. These will have pinch clips that you must squeeze lightly to release before they come free.
- Remove any screws holding the back of the card to the chassis. Some older motherboards may also have screws securing the card to the PCIe slot.
- Locate the clip at the end of the PCIe slot and press out. This will release and safely eject the card. If the card feels stuck, gently pull it up and rock it end-to-end (never side-to-side, or you risk damaging the connector pins) to free it.
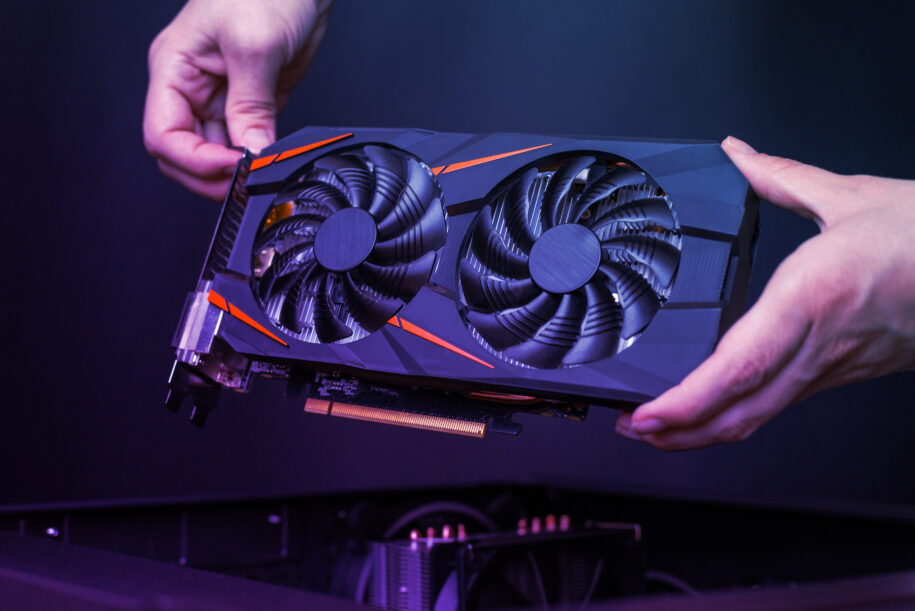
Installing The New GPU
You’re halfway there. Now it’s time to plug in your shiny new GPU:
- Unpack your new card. Save the anti-static bag it shipped in to store your old GPU.
- Line up your new card’s PCIe connectors with your selected expansion slot. Press gently and evenly down the length of the card until you hear the clip snap into place, locking the card into the slot.
- Insert and tighten all securing screws.
- Connect the PSU power cables, being sure to follow any manufacturer instructions.
- Reattach the side panel to the case and reconnect all cables to your tower.
Configuring The New GPU
Congratulations—the hard part is over! Now, it’s time to restart your computer and finish the software upgrades.
- Install the latest drivers and control software from the NVIDIA or AMD website. The card may have shipped with a CD containing drivers; however, these discs may be outdated, so we recommend downloading from the site to get the latest version.
- Follow the setup process to optimize the performance of your new graphics card for your specific needs, such as gaming or video editing.
- To ensure full compatibility and the best possible performance, we also recommend updating your BIOS at this stage.
- Configure your system settings to fully utilize your new card’s features, such as multi-monitor support.
- Run a benchmark test to verify everything is working and performing its best.
- Start gaming!
Upgrade Your GPU With CyberPower PC
Upgrading your GPU is the easiest way to level up your gaming experience. Partnering with CyberPowerPC is the easiest way to ensure you’re always getting the best bang for your computing buck. If upgrading your GPU doesn’t bring you the performance you want, consider upgrading to a purpose-built high-performance gaming PC. Our PC gaming experts build them to deliver the performance you need, at a price you can afford.
Prefer building or upgrading your own gaming PC? Contact the CyberPowerPC support team via live chat for tips and guidance!
Troubleshooting FAQs
Can I just swap out my GPU?
In many instances, you can simply swap out your old GPU for a new one. If the rest of your hardware is too old or not powerful enough, more upgrades may be necessary.
How do I get my computer to recognize my new graphics card?
If your computer won’t recognize your new graphics card, you may have to disable integrated graphics via your Device Manager. This setting will force the computer to use your new GPU.
How do I uninstall my old graphics card and drivers?
After removing your old GPU, the cleanest way to uninstall your old drivers is to use a utility like Display Driver Uninstaller. This ensures no traces of it remain in your PC registry.
Why is my monitor not displaying anything after installation?
Chances are, the new card or one of the cables is not seated correctly. Shut down your computer, disconnect all cables, and walk through the installation steps again to verify that the new card seats fully, all screws are secure, and the power and graphics cables are all fully seated and secured.